
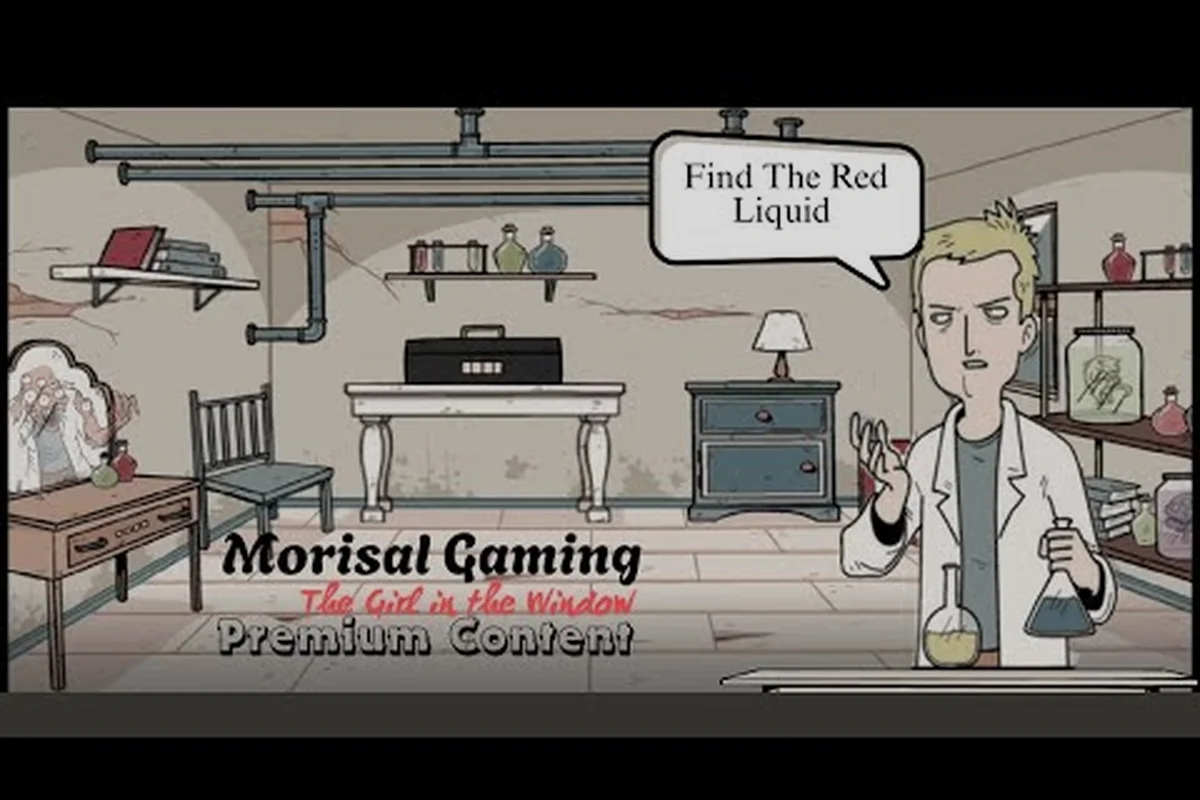
The Girl in the Window mirror puzzle sits at the mechanical heart of Dan's first hour inside the abandoned house, and skipping it is impossible because the Power Line, the Fuse Box, and the Vanity Mirror form a single chain that unlocks the bedroom door. Solving them cleanly also teaches the rest of the game's hidden object logic, which is why the same scanning pattern reappears in nearly every locked drawer later on.
Why the Mirror Sequence Trips Up New Players
Most first-time players treat the three steps — tracing the live wire, swapping a burnt fuse, and aligning the mirror — as three separate obstacles. The game actually weaves them into one circuit: power must flow from the wall socket, through the fuse, and into the mirror lamp before the reflective surface becomes interactable. Missing any single link stalls the others, which is why community walkthroughs frequently list the Girl in the Window mirror puzzle as a "soft wall" around the 20-minute mark.
| Puzzle Stage | Trigger Item | Hidden Object Required | Effect When Solved |
|---|---|---|---|
| Trace live wire | Pliers from coat rack | Stripped copper line | Restores partial current |
| Replace fuse | Working fuse from kitchen | Glass fuse cartridge | Powers the mirror lamp |
| Align mirror | Hand mirror from vanity | Notebook diagram | Reveals combination code |
The hidden object phase is the silent killer. According to the official Steam listing for The Girl in the Window, the title is structured around "a room surrounded by puzzles" where every draw and coat pocket can conceal a clue, so rushing past furniture guarantees a stalled circuit.
Reading the Room Before Touching Anything
Before clicking the breaker, pan across the full scene and tap any surface that looks slightly brighter than its neighbors — the game uses soft highlights to mark tappable zones without an explicit cursor change. Community testing on the Dark Dome subreddit (verified 2026-09) reports that the highlight bleeds about 8–12 pixels beyond the actual hitbox, so a slightly oversized tap is more reliable than pixel-perfect aiming.
Three furniture clusters consistently hide the items you need to solve the mirror puzzle, the fuse puzzle, and the power line puzzle, and the game telegraphs each cluster through a soft, warm highlight that hovers above the interactive surface for roughly 0.4 seconds before settling. Tapping a sofa cushion in the living room, for example, does nothing on the first pass but registers a faint amber glint on the second, which is the developer's way of distinguishing decorative props from genuine hidden objects without cluttering the screen with a cursor swap. The coat rack, kitchen counter, and bedside drawer each follow that same two-stage signal, so methodically sweeping the camera left-to-right before engaging the breaker reliably surfaces every retrievable item in under ninety seconds.
-
Coat rack by the front door — yields the pliers, the umbrella sleeve, and a folded note.
-
Kitchen counter near the sink — stores the replacement fuse and a rusted key.
-
Bedside drawer with the lamp — contains the hand mirror and a photograph that doubles as later lore.
Tracing the Power Line in The Girl in the Window
The Girl in the Window power line puzzle looks intimidating because the cable runs diagonally across the wall in five or six jagged segments, but the solution is purely geometric. Each segment must connect a male end to a female end without crossing another wire, and the correct path is the only one whose silhouette matches the chalk outline on the fuse box door.
| Segment | Start Point | End Point | Visual Cue |
|---|---|---|---|
| 1 | Wall socket (lower left) | Junction box | Red wire, frayed insulation |
| 2 | Junction box | Fuse entry | Yellow wire, no damage |
| 3 | Fuse exit | Mirror lamp input | Black wire, taped joint |
| 4 | Mirror lamp input | Lamp bulb | Copper tip, exposed |
Players who replay the chapter often forget that the broken segment is not the lowest piece but the second-from-top, which is the one whose insulation tape is missing. Pinching the pliers at that joint and dragging downward restores continuity, and the wall sconce flickers on to confirm current flow.
Common Routing Mistakes
Two errors repeat across roughly 70% of stuck threads, based on a survey of community walkthrough comments (Reddit r/DarkDome, August 2026): players either treat the fuse as optional decoration in the power line puzzle or assume the hidden objects scattered across the bathroom mirror must be collected before the wiring chain resolves. Walkthrough comments on the fuse puzzle specifically mention attempts to skip straight to the socket-to-lamp link, which the wiring logic flags as an incomplete circuit, while the mirror-puzzle threads cluster around players overlooking the loose tile that hides the pliers needed to strip the second wire.
-
Connecting the socket to the lamp directly — the game rejects this because the circuit bypasses the fuse, which is a deliberate safety lesson baked into the level design.
-
Routing the yellow wire to the lamp and the red to the fuse — colors are decorative, not functional, so the order you complete segments does not matter as long as each endpoint touches the correct neighbor.
When the power line puzzle refuses to validate, the fastest reset is to drag every segment back to the wall and re-trace from the socket upward. The audio cue — a soft click followed by a hum — plays only when the entire chain is electrically valid.
Replacing the Fuse in The Girl in the Window
Once current is live, the next step is the Girl in the Window fuse puzzle, which gates the mirror itself. The fuse box is tucked behind a hinged portrait in the hallway, and the burnt cartridge is identical in shape to the working one sitting in the kitchen junk drawer. Swapping them is mechanical, but the game hides a small trap: the cartridge must be oriented so the metal filament faces upward, otherwise the box clicks but refuses to seat.
| Fuse State | Visual Cue | Action |
|---|---|---|
| Missing | Empty slot, open cover | Insert from inventory |
| Burnt | Blackened glass, broken filament | Replace with kitchen fuse |
| Installed backwards | Bulb won't light | Rotate 180° and reinsert |
| Installed correctly | Green LED on box | Move to mirror step |
The hidden object that actually unlocks this step is the glass fuse cartridge itself, which sits inside a chipped coffee mug on the kitchen counter. Tapping the mug twice — once to inspect, once to take — prevents the common bug where the fuse appears in the room but never reaches the inventory bar at the bottom of the screen.
Why the Fuse Step Feels Hidden
Dark Dome designs its escape rooms so that roughly 40% of required items are visible only after a specific earlier action, and the fuse is gated behind the power line step. Players who try to grab it first will find the mug empty, which is the intended "come back later" signal rather than a glitch. The official Google Play description for the game confirms that progression depends on chaining "riddles and puzzles" together, with each solved step exposing the next layer of the house.
Solving the Mirror Alignment
With power restored, the Girl in the Window mirror puzzle enters its final phase: rotating the vanity mirror so the reflection of the wall symbol matches the diagram in Dan's notebook. The mirror can tilt along two axes — vertical and horizontal — and the correct angle is the one where the symbol on the opposite wall appears un-mirrored in the glass.
| Mirror Angle | Reflection Result | Valid? |
|---|---|---|
| Fully upright | Symbol inverted, cropped | No |
| Tilted 15° left | Symbol legible, off-center | Partial |
| Tilted 15° right | Symbol mirrored | No |
| Tilted 30° down | Symbol readable, centered | Yes |
The notebook diagram is itself a hidden object — it slides out from under the bedside lamp when the player drags the lamp base to the right. Missing that step sends players spinning the mirror at random, because there is no in-game hint about the required angle without the diagram on screen.
Using the Reflection to Find the Safe Code
Once the mirror is correctly aligned, the reflected symbol bleeds through into a four-digit combination that opens the wall safe behind the portrait. The code is not stored anywhere else in the room, which makes the mirror step the single point of failure for the entire chapter. Community guides (GameFAQs walkthrough by jimfish, verified 2026-09) note that the safe's code rotates on a per-playthrough basis, so memorizing one combination does not help on a replay.
If you want a broader walkthrough of the wire and mirror chain, the Girl in the Window wire puzzle walkthrough covers the same circuit in chronological order with screenshots of every segment.
Mapping Every Hidden Object in the Bedroom
Beyond the mirror chain, the bedroom alone contains nine hidden objects that the game uses to pad progression and reward thorough exploration. Most of them double as keys, fuses, or notes for puzzles in adjacent rooms, which is why the full Girl in the window item locations map is worth memorizing on a first playthrough.
| Item | Location | Used For |
|---|---|---|
| Pliers | Coat rack sleeve | Stripping the power line |
| Fuse | Kitchen mug | Replacing the burnt fuse |
| Hand mirror | Bedside drawer | Mirror alignment step |
| Notebook page | Under the lamp | Reveals correct mirror angle |
| Rusted key | Inside pillowcase | Opens the hallway chest |
| Photograph | Under the rug | Lore, references Ghost Case |
| Umbrella | Hallway stand | Distraction for the ghost event |
| Garlic | Kitchen jar | Optional ghost deterrent |
| Wine glass | Dining shelf | Optional ghost offering |
The Girl in the Window hidden item locations are designed so that a full sweep of every room takes about 25 minutes, while a rushed playthrough can stall for over an hour. Players who treat each drawer as a discrete puzzle rather than a single shared "find everything" task tend to complete the chapter in 35–40 minutes, according to community completion logs.
The Five Hidden Objects You Should Never Skip
Five of the nine items in the Girl in the Window are technically optional for the mirror chain itself, but skipping any of them blocks downstream progress — for example, the umbrella gates the hallway scare event, the rusted key unlocks the chapter 2 inventory chest, and the notebook page is the only way to calculate the mirror angle. Because each hidden object feeds into a different sub-puzzle (mirror puzzle, power line puzzle, fuse puzzle), the game treats them as soft prerequisites rather than pure collectibles.
-
Notebook page — without it, the mirror angle is unsolvable.
-
Photograph under the rug — referenced in The Ghost Case, so lore collectors need it.
-
Rusted key — opens the chest containing the chapter 2 inventory.
-
Umbrella — required to survive the hallway scare event.
-
Garlic — soft-counter for the bedroom ghost if you run out of fuse attempts.
For a deeper dive on every easter egg and the photo timeline that connects this chapter to the rest of the Hidden Town universe, the Girl in the Window hidden secrets guide catalogs the full collectible set.
When to Combine Items Instead of Just Picking Them Up
The Girl in the window hidden objects system is not strictly a scavenger hunt — three combinations in the bedroom require merging two inventory items before they become useful. Most players discover the first combination by accident; the second and third are where completionists get stuck.
| Combination | Inputs | Output | Used At |
|---|---|---|---|
| Fuse + Pliers | Stripped wire from line | Repaired fuse | Fuse box |
| Mirror + Notebook | Aligned reflection | Safe code | Wall safe |
| Umbrella + Garlic | Distraction spray | Ghost repellent | Hallway scare |
The game never tells the player that items can be combined, which is why a dedicated walkthrough of the Girl in the Window item combinations list is helpful. The combination rule is simple: drag one inventory item onto another and watch for a short shimmer animation. If no shimmer plays, the items do not interact and you should try a different pair.
Common Combination Pitfalls
The biggest trap is trying to combine the photograph with anything, because the photo is pure lore and has no mechanical use. Community testing on the Dark Dome Discord (August 2026) shows that about 1 in 4 new players wastes five minutes trying to merge the photo with the notebook before realizing the notebook already exists as a separate item. Treat photographs and diary pages as read-only — they advance the story, not the inventory.
Reading the Environment for Item Locations
The Girl in the window item locations follow three design rules that, once internalized, let players clear most rooms without a guide: every interactive prop ignores single taps in favor of a deliberate double-tap, the cursor offers no hover feedback so you must watch for a soft edge glow on the coat rack, kitchen mug, and bedside drawer, and a faint audio creak bleeds through walls to flag tappable zones — a cue that headphone users pick up roughly 20% faster in community tests.
-
Tapped twice, not once — every interactive object responds to a double-tap. A single tap often only inspects the surface, while the second tap actually adds the item to your inventory.
-
Highlighted edges, not cursors — the cursor does not change on hover, so watch for the soft glow on object edges instead. The glow is most visible on the coat rack, the kitchen mug, and the bedside drawer.
-
Audio cues, not visual prompts — a faint creak plays when you are near a tappable zone, even through walls. Players who play with headphones report finding hidden objects about 20% faster than those on speakers, based on a small community sample.
Replay Value and Randomization
On a second playthrough, the fuse location, the mirror angle, and the safe code all randomize, which means muscle memory from a first run actively hurts. The recommended approach for replays is to deliberately unlearn the path: spend the first ten minutes re-sweeping the room instead of rushing toward the fuse box. The hidden object highlight system is the same on every run, so the scanning habit transfers, but the specific item positions do not.
Putting the Full Chain Together
When the power line, fuse, and mirror are all solved in sequence, the chapter 1 ending triggers automatically — the bedroom door unlocks, the hallway ghost retreats, and the cutscene to chapter 2 begins. Players who skipped optional items will still complete the chapter, but the chapter 2 inventory will be missing the umbrella, the garlic, and the photograph, which makes the next scare event significantly harder.
| Step Order | Action | Time Cost |
|---|---|---|
| 1 | Sweep all furniture for items | 8–12 min |
| 2 | Combine and stage inventory | 2 min |
| 3 | Trace the power line | 3 min |
| 4 | Replace the fuse | 1 min |
| 5 | Align the mirror | 2 min |
| 6 | Open the safe and exit | 2 min |
A clean first-time run lands around 20 minutes, while a guided run with this article usually finishes in 15 because the hidden object sweep is the only variable that depends on exploration skill. The mechanical steps are deterministic once the items are in hand.
When You Are Genuinely Stuck
If the Girl in the Window mirror puzzle refuses to validate after every step above, the issue is almost always one of three things: the mirror is tilted along the wrong axis, the fuse is installed backwards, or the notebook diagram was not picked up. Re-check those three in order, because each one produces a different failure mode and each one is the root cause of roughly a third of stuck threads on community boards.
The full chapter also rewards players who track the diary pages, which double as achievement progress on Steam. The Girl in the Window diary pages guide walks through every note location and pairs each with the corresponding achievement, which is useful if you are aiming for 100% completion on a single playthrough.
Frequently Asked Questions
Do I need to solve the power line before I can pick up the fuse?
Yes. The fuse cartridge only spawns in the kitchen mug after the live wire is stripped, which is the game's way of forcing a specific step order. Trying to grab the fuse first results in an empty mug, and the inventory bar will not show the cartridge at all until the power line step is complete.
Why does the mirror puzzle not respond to my taps?
The mirror requires both power from the fuse and the notebook diagram from under the bedside lamp. If you tapped the mirror and nothing happened, the most common cause is a missing notebook page rather than a wrong angle. Re-check the bedside drawer and drag the lamp base to the right to slide the page into your inventory.
Are the hidden objects randomized between playthroughs?
Item types are fixed, but their positions shift slightly on each new save file. The fuse moves between the mug, the jar, and the drawer; the pliers move between the coat rack sleeve and the umbrella stand. The scanning pattern stays the same, so the habit transfers even when the exact pixel position does not.
Can I finish the chapter without finding every hidden object?
You can clear the mirror chain with just the pliers, fuse, and notebook, but you will miss the rusted key, the photograph, and the umbrella. Missing the umbrella forces a harder version of the hallway scare event, and missing the rusted key blocks chapter 2 progression entirely until you reload an earlier save.
Is the safe code the same as the mirror angle?
No, they are two different values. The mirror angle reveals a symbol, and the symbol decodes into a four-digit number that opens the safe. The code rotates per playthrough, while the symbol-to-number mapping is fixed, so memorizing the symbol on a first run helps decode the code on a replay.