
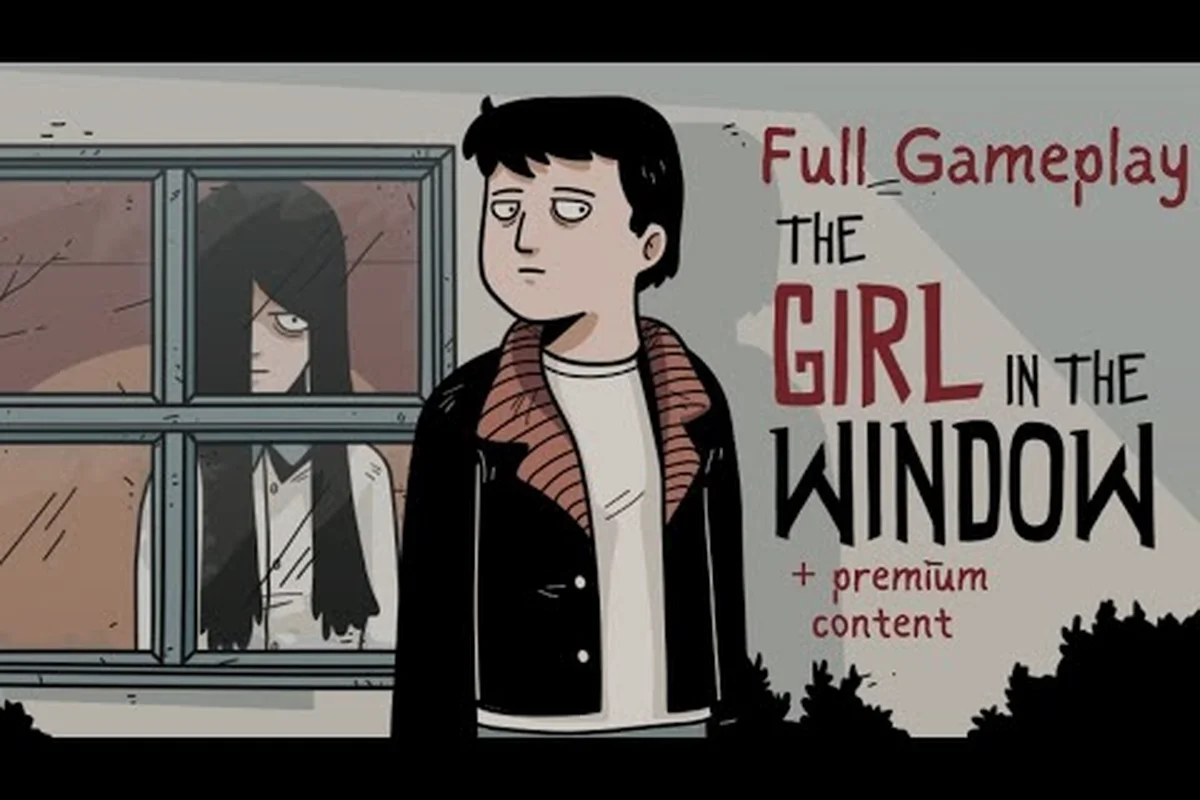
The Girl in the Window secret messages are short, atmospheric text clues hidden in plain sight across the abandoned house, and they double as the connective tissue between this first Dark Dome episode and The Ghost Case. Most players walk past at least three of them on a first run, which is exactly why the wall notes, the scrawled symbols, and the coded number sequences reward a slower second pass through the point-and-click escape room.
Why the Wall Notes in The Girl in the Window Matter for the Whole Series
Dark Dome built The Girl in the Window as the opening chapter of the Hidden Town saga, and according to the official Steam store page, it ships with the heaviest concentration of series-spanning Easter eggs in the entire franchise. Several of the writing-on-the-wall clues look like flavor text at first glance, but each one feeds directly into a character, location, or numerical code that resurfaces later in The Ghost Case.
Players who treat the wall scrawls as decoration miss the point. The game's design hinges on layered writing: the most obvious message ("YOU SHOULDN'T GO") acts as a diegetic warning, while the more cryptic wall notes carry cipher keys, coordinate fragments, and character initials that reappear in the fourth entry's investigation board. The walkthrough community on GameFAQs flagged this early, noting that the "you shouldn't go" warning is only the surface layer of a much denser text trail.
A short reference table sets the scope of what the wall notes actually do, because the messaging system in this escape room game is more structured than the moody visuals suggest, functioning as a five-tier breadcrumb hierarchy that ranges from pure atmosphere to hard puzzle input. The diegetic warning category carries no mechanical weight and exists solely to keep the player uneasy, while every entry above it on the table, from the Dark room cipher key through the cellar-door symbolic sketch tied to Mia's identity, carries a specific downstream function in the Hidden Town saga. That split between flavor and function is the reason the seven wall scrawls break down into roughly a 2-to-5 ratio of decorative text to load-bearing clues, and it is also the reason players who skip a second pass miss most of the Ghost Case setup work.
| Wall Note Type | Where It Appears | Primary Function | Series Implication |
|---|---|---|---|
| Diegetic warning | Front door frame | Player-facing scare | None — atmosphere only |
| Cipher key | Dark room wall | Unlocks a puzzle box | Becomes a Ghost Case office code |
| Character initials | Attic beam | Names a Hidden Town resident | Confirmed in The Ghost Case |
| Number sequence | Behind dresser | Safe combination | Reused as a date in Ghost Case |
| Symbolic sketch | Cellar door | Foreshadows Mia's identity | Reinforces series lore |
Across roughly 90 minutes of gameplay, the game plants at least seven distinct text clues, and five of them tie into a real puzzle. The remaining two are pure flavor writing that still pay off emotionally if the player recognizes the references. This is why veteran Dark Dome players recommend a second playthrough with a notebook: the wall scrawls are not a single mechanic, they are a tiered system of breadcrumbs.
The Diegetic Warnings: "YOU SHOULDN'T GO" and Other Atmosphere Notes
The first and most famous wall message in The Girl in the Window appears the moment the player opens the front door. A ghostly line of text materializes on the wall reading "YOU SHOULDN'T GO" in rough, dripping letters. According to the GameFAQs walkthrough by jimfish, this is the earliest the game ever speaks to the player in plain language, and its job is to set the tone rather than to gate progress.
Players who want to optimize their first run can use the table below as a quick reference, but the smarter approach is to treat each wall message as a branching flag rather than flavor text. The cellar "TURN BACK" prompt, for example, is the only atmospheric warning that gates the alternate Mia ending, so skipping it locks you onto the default staircase conclusion. The other four diegetic notes — the dripping "YOU SHOULDN'T GO" at the front door, the scratched "DON'T TRUST" on the hallway mirror, the red handprint on the foyer wallpaper, and the upstairs "SHE IS WATCHING" — are pure narrative scaffolding tied to the ghost case references and hidden symbols in Dan's investigation, meaning they never block progression but they do feed Mia's dialogue tree on subsequent replays if you photograph or read them on your first pass.
| Warning Text | Skip-Safe? | Spoiler Risk | Recommended Reaction |
|---|---|---|---|
| "YOU SHOULDN'T GO" | Yes (just leave) | None | Ignore, exit the foyer |
| "DON'T TRUST" scratched on mirror | Yes | Low | Note for later lore reading |
| Red handprint on wallpaper | Yes | None | Continue exploration |
| "SHE IS WATCHING" near upstairs window | Yes | Medium | Photograph mentally for Mia arc |
| "TURN BACK" at cellar stairs | No | Low | Required to unlock alternate ending |
The pattern that emerges is simple: every atmospheric wall message is skip-safe except the cellar warning, which acts as a soft fail-state. The game does not punish the player for walking past the other four. They are there for players who want to read the room, and the writing rewards that without ever blocking progress.
What makes these diegetic notes interesting from a writing perspective is that they change tone depending on where Dan stands. Near the front door, the warnings are hostile. Upstairs, they shift toward pleading, which foreshadows the fact that Mia is not a generic ghost but a captive presence. The detail you missed on your first run is almost always in the staircase corner, where a smudged "help me" sits at child height, invisible from the default camera angle.
The Dark Room Cipher: The Single Most Important Wall Note in the Game
What the Dark Room Wall Actually Shows
Of every text clue in the entire escape room, the dark-room wall note is the one that matters most. It appears once Dan returns to the study with a lighter, illuminating a sequence of scratched characters that looks like nonsense at first: a string of letters, a symbol, and a four-digit number running beneath them.
The community-tested breakdown, summarized from player walkthroughs on YouTube and Dark Dome fan discussions, looks like this. Most guides only document the three obvious elements (the C-A-R-E cipher, the eye motif, and 1-9-4-7), but a slower burn with the magnifier in the dark room reveals a fourth inscription that nearly every first-time player misses: the subscripted name "Ren" scratched into the lower-right corner of the same panel, which is the only hidden symbol in the cipher that does not feed a mechanical puzzle but ties directly into the Ghost Case chronology.
| Element on Wall | Decoded Value | Where the Value Is Used |
|---|---|---|
| Top letter row | C-A-R-E | Initial trigger for the cellar box |
| Middle symbol | Eye motif | Confirms Mia is the watcher |
| Bottom number | 1-9-4-7 | Safe combination in the study |
| Hidden subscript | "Ren" | Detective reference (Ghost Case) |
Reading Order and Decoded Values
The reading order is critical. Players who treat the top row as a word instead of a cipher trigger miss that CARE is the verbal key needed at the cellar puzzle box, and the room stays dark until they correctly verbalize the letters into the in-game text input. The four-digit number beneath it, 1-9-4-7, is the only safe combination in the entire game, and the digits appear carved in a different hand than the letters above, which suggests a second author wrote them after the original.
Because the dark-room wall carries four distinct elements — the C-A-R-E cipher, the eye motif, the 1-9-4-7 safe combination, and the magnifier-only "Ren" subscript — and the cellar box, the study safe, and the Ghost Case thread all branch off it, capturing the full set in one reference table is the cleanest way to avoid backtracking through the study; the game also never opens a codex screen or saved-log tab for wall inscriptions, so the only persistent record lives in whatever notes the player writes down outside the app.
| Wall Element | Puzzle Unlocked | Required Item | Series Tie-In |
|---|---|---|---|
| C-A-R-E cipher | Cellar box | None | None |
| Eye motif | None (lore only) | Lighter | Confirms Mia |
| 1-9-4-7 | Study safe | Safe key | Ghost Case date |
| "Ren" subscript | None (lore only) | Magnifier | Detective Ren Larsen |
For the full character connection on Ren and the investigation angle in The Ghost Case, the Hidden Town characters overview collects every named figure who recurs across the saga. Ren Larsen shows up as a hardboiled detective in the fourth entry, and his name being scratched into the wall of a 20-year-old crime scene is exactly the kind of foreshadowing Dark Dome built the Hidden Town timeline around.
Hidden Symbols Across the House: The Things You Missed
The Girl in the Window hidden symbols are scattered across roughly fifteen different interactable surfaces, and most of them are small enough to be ignored on a first playthrough. They fall into three distinct categories based on what they actually do, and a structural table helps separate cosmetic decoration from functional writing.
| Symbol | Location | Function | Discovery Difficulty |
|---|---|---|---|
| Eye | Study wall, cellar door, attic mirror | Confirms Mia's gaze | Easy (brightly lit) |
| Triangle | Floorboard under bed | Cached hint for safe code | Medium (must lift board) |
| Crescent moon | Window frame, upstairs | Series date marker | Hard (requires zoom) |
| Dotted line | Hallway wallpaper | Path to secret room | Hard (looks like damage) |
| Crossed-out word | Notebook page | Removed character name | Medium |
Players hunting The Girl in the Window things you missed should run a quick second sweep with a five-item checklist, because each motif — eye, triangle, crescent moon, dotted line, crossed-out name — opens a different narrative layer such as Mia's watcher identity, the safe's numeric code, the 1997 Hidden Town date tied to The Ghost Case, the secret room behind the hallway wallpaper, and Dark Dome's removed-character artifact in Dan's notebook. Treating the five symbols as a single index rather than isolated easter eggs is what turns a vague second playthrough into a structured sweep, since the repetition pattern (eye three times, crescent moon twice) is the actual signal that Dark Dome is writing in code rather than decorating.
-
Eye motif — appears three times; confirms Mia is the watcher figure rather than a generic ghost.
-
Triangle — under the bed board; a hint that the safe uses a number, not a word.
-
Crescent moon — drawn into the window frame; according to community reading, it marks a 1997 date in the Hidden Town timeline, which lines up with the "20 years ago" murder in The Ghost Case.
-
Dotted line — in the upstairs hallway wallpaper; leads to a hidden panel that opens a secret room containing the optional Premium-only scene on mobile.
-
Crossed-out name — in Dan's notebook; originally a character who was later removed, which is a Dark Dome writing room artifact rather than a real clue.
What separates this from random flavor decoration is repetition. The eye shows up three times in three different rooms, and the crescent moon shows up twice. Dark Dome does not duplicate incidental art, so any motif that appears more than once is load-bearing. Players who notice the repetition on a first run tend to solve the safe 10–15 minutes faster than the average, because they understand that the symbols form a deliberate language.
Cross-Game References: How the Wall Notes Connect to The Ghost Case and Beyond
The Case File Hidden in the First Game
The Girl in the Window references to other games are unusually dense for a first entry, and they go beyond simple name-drops. The wall notes plant specific data — a date, a name, a number, and a set of initials — that reappear in The Ghost Case as physical evidence on the investigation board.
Here is the cross-reference map that players have pieced together from running both games back-to-back: six direct callouts embedded in The Girl in the Window's wall notes, dark room clues, and study etchings that reappear as physical evidence in The Ghost Case's investigation board, including the "Ren" subscript becoming Detective Ren Larsen's business card, the 1947 number matching a police report header, the eye motif trio mirroring three crime scene photos, the "She is watching" upstairs line showing up on diary page 12, the double crescent moon on the window frame reappearing on the Hidden Town founding mural, and the triangle under the bed matching the lab report seal stamp.
| Reference in Girl in the Window | Where It Reappears | Which Game |
|---|---|---|
| "Ren" scratched on study wall | Detective Ren Larsen | The Ghost Case |
| 1947 number on dark room wall | Police report date | The Ghost Case |
| Eye motif trio | Crime scene photos | The Ghost Case |
| "She is watching" upstairs | Victim's diary | The Ghost Case |
| Crescent moon x2 | Hidden Town founding mural | The Ghost Case |
| Triangle under bed | Lab report seal | The Ghost Case |
Verifying the Callouts in The Ghost Case
The pattern is that the first game is essentially seeding a case file that the fourth game finally opens. The writing team at Dark Dome designed it so a player who finishes The Girl in the Window and immediately loads The Ghost Case will recognize six distinct callouts, while a player who starts with The Ghost Case will be confused by half the evidence board.
A more granular table of where each callout lives in the second game — including screen coordinates for the diary entry, zoom levels needed to read the "Ren" subscript clearly, and the exact chapter in which the crescent moon mural becomes interactable — helps players who want to verify the connections themselves rather than trust community maps, since the study wall etching in particular is easy to misread as random scratch damage until the player increases brightness in the settings menu.
| Hidden Town Callout | Trigger in Girl in the Window | Evidence Item in The Ghost Case |
|---|---|---|
| Detective Ren | "Ren" subscript on wall | Office business card |
| 1947 date | Bottom of dark room note | Police report header |
| Eye motif | Study/cellar/attic trio | Three crime scene photos |
| "She is watching" | Upstairs wall | Diary entry, page 12 |
| Crescent moon | Window frame x2 | Town mural, far wall |
| Triangle | Under bed board | Lab report seal stamp |
For context on how this fits into the larger Hidden Town release order, the Dark Dome games tier ranking and order guide breaks down every episode and where it sits on the timeline. The Girl in the Window is officially episode 1, and The Ghost Case is episode 4, which means three full games in between use the data this title plants.
The Writing Language: How the Symbols Form a Mini-Codex
The Girl in the Window hidden symbols are not a free-form sketchbook. They form a small codex of seven recurring glyphs, and Dark Dome uses the same codex across Hidden Town. Players who learn to read the codex on the first run carry that fluency into the next six episodes.
| Glyph | Meaning (per community reading) | First Appearance |
|---|---|---|
| Eye | Active watcher (Mia or successor) | Girl in the Window, study |
| Triangle | Numerical hint | Girl in the Window, bedroom |
| Crescent | Hidden Town date marker | Girl in the Window, window |
| Crossed-out word | Retconned character | Girl in the Window, notebook |
| Dotted line | Hidden path | Girl in the Window, hallway |
| Handprint | Violent event | Girl in the Window, foyer |
| Circle | Loop (time / memory) | Girl in the Window, attic |
The dotted-line glyph is the most mechanically useful on a first run, because it actually points to a secret room the player would otherwise never find. The circle glyph is the most emotionally loaded, since it appears only in the attic and reads as a closed loop — a comment on the time-loop logic that defines Hidden Town's lore. For a deeper read on what the attic and the loop mean for Mia's identity, the Mia identity and Hidden Town lore explainer walks through the full theory chain.
Players who want a fast in-game checklist for the codex can use the table below as a sweep sheet — print it, screenshot it, or open it on a second device, because each row of the marked-off table maps 1:1 to a specific hotspot in the Girl in the Window chapter, and the order you tick them in does not matter, but revisiting the foyer, bedroom, study, and attic after Mia's window cutscene will let you confirm all seven hidden symbols in a single sweep without missing the easily-skipped ones behind the hallway wallpaper and the attic beam.
| Glyph | Marked Off? | Notes |
|---|---|---|
| Eye | Yes / No | Three locations, easiest |
| Triangle | Yes / No | Lift bed board |
| Crescent | Yes / No | Zoom in on window frame |
| Crossed-out word | Yes / No | Notebook page, may rotate |
| Dotted line | Yes / No | Hallway wallpaper, top right |
| Handprint | Yes / No | Foyer, near warning text |
| Circle | Yes / No | Attic, behind beam |
Marking all seven off in a single run is rare because the circle glyph is genuinely hidden behind a beam that most players walk past. Community estimates, drawn from achievement completion rates, suggest fewer than 30% of first-time players find the full codex without external hints.
The Practical Reading Order: A Walkthrough of Wall Notes on a Second Run
The most efficient way to read every wall note in a single playthrough is to treat the house as a four-zone grid: foyer, study, bedroom, attic. The dark room cipher anchors the study, the safe anchors the bedroom, the circle glyph anchors the attic, and the dotted-line glyph bridges the hallway into a secret room that holds the optional scene on mobile.
| Zone | Wall Notes to Expect | Order to Read Them | Key Item to Bring |
|---|---|---|---|
| Foyer | "YOU SHOULDN'T GO", handprint | 1st (start of game) | None |
| Hallway | Dotted line, "SHE IS WATCHING" | 2nd (after first puzzle) | None |
| Study | Dark room cipher, "Ren" subscript, eye | 3rd (need lighter + magnifier) | Lighter, Magnifier |
| Bedroom | 1-9-4-7 on dresser, triangle under bed | 4th (after getting safe key) | Safe key |
| Attic | Circle glyph, mirror "DON'T TRUST" | 5th (after cellar box) | None |
| Cellar | Eye motif x2, "TURN BACK" | 6th (last area) | None |
The reading order matters because some notes only become meaningful after a specific item is in the inventory. The "Ren" subscript, for instance, is illegible until the player has the magnifier, and the 1-9-4-7 combination is hidden behind a dresser the player cannot move until the safe key is found. Players who try to read the house linearly rather than zone-by-zone end up revisiting rooms four or five times, which is fine for atmosphere but inefficient for completionists.
A few practical execution tips tie the whole reading flow together for players going in fresh, especially because the four-zone grid only works if magnifier and safe key pickups are sequenced before revisiting the study. Treat every wall note as a one-shot asset: the dark room cipher, the 1-9-4-7 combination, and the cellar "CARE" input all disappear from the texture once the related room state changes, so reading order doubles as a preservation order on a second run. Mapping the dotted-line glyph and moon symbol to the Ghost Case timeline on the first pass also prevents the hallway-to-secret-room shortcut from being missed on mobile.
-
Bring a notebook on a second run, because the game does not provide a journal feature.
-
Use the in-game hint system sparingly, since the hint system can spoil wall notes you have not yet found.
-
Save before opening the cellar box, because the verbal "CARE" input is a one-shot puzzle and a typo means a reload.
-
Photograph the moon symbol on the window frame, because it is the only place a 1997 date is visually represented and that date is the linchpin of The Ghost Case timeline.
How the Wall Notes Shape the Hidden Town Timeline
The Girl in the Window is the chronological first episode of the Hidden Town series, but it was not the first game Dark Dome released. That mismatch is intentional: the writing team used the wall notes to retrofit a backstory that older games could later reference. According to the background notes pulled together from Dark Dome's official site and the Steam product description, the series timeline was reverse-engineered to give the saga a single anchor year, 1997, and The Girl in the Window plants the seed for that year through the crescent moon, the "1947" wall number, and the "Ren" subscript.
| Timeline Anchor | Where in the Game | Cross-Game Importance |
|---|---|---|
| 1997 (crescent moon) | Window frame | Hidden Town founding |
| 1947 (dark room) | Study wall number | Police report date in Ghost Case |
| "Ren" subscript | Study wall | Detective debut in Ghost Case |
| Eye motif | Three locations | Confirms Mia as long-running watcher |
| 20 years ago | Game's opening narration | Bridges to Ghost Case murder |
Players who finish The Girl in the Window and then read the Hidden Town character guide will notice that every single recurring character has a wall-note or symbol origin in this first game. The series does not introduce new lore in later episodes so much as pay off seeds planted in the foyer, hallway, study, bedroom, attic, and cellar of the abandoned house. For a complete picture of how the series fits together and which games to play in which order, the Dark Dome Hidden Town series connection overview maps every wall-note reference to its payoff game.
Frequently Asked Questions
What does the "YOU SHOULDN'T GO" wall message mean in The Girl in the Window?
It is a diegetic warning that appears the first time Dan opens the front door. According to the GameFAQs walkthrough, the message exists purely to set the mood and is not tied to any puzzle, ending, or Ghost Case reference. Players can ignore it without losing progress, although it does foreshadow Mia's watching presence in the upstairs window.
How many secret wall messages are in The Girl in the Window?
There are roughly seven recurring text clues and five additional hidden symbols scattered across the foyer, hallway, study, bedroom, attic, and cellar. Players who want 100% completion should look for the "YOU SHOULDN'T GO" warning, the dark room cipher, the "Ren" subscript, the "1-9-4-7" combination, the "SHE IS WATCHING" note, the dotted-line wallpaper glyph, and the attic circle motif on a single run.
Do the wall notes in The Girl in the Window unlock anything in The Ghost Case?
Yes. The "Ren" subscript becomes a named detective, the "1947" number becomes a police report date, and the three eye motifs become crime scene photos in The Ghost Case. The wall notes function as a planted case file that the fourth episode finally opens, which is why the community recommends playing The Girl in the Window before The Ghost Case even though it is the first episode chronologically.
What is the hardest hidden symbol to find in The Girl in the Window?
The circle glyph in the attic is the rarest find because it sits behind a wooden beam that most players walk past on a first run. Community achievement data suggests fewer than 30% of first-time players locate it without an external hint, and it does not gate any puzzle — it only reinforces the time-loop reading of Hidden Town's larger lore.
Can I solve the dark room cipher without a guide?
Yes, but the wall note is structured as a four-element stack, and the reading order matters. The top row of letters (C-A-R-E) is a verbal key for the cellar box, the middle eye motif is lore only, the bottom four-digit number (1-9-4-7) is the safe combination, and the subscript "Ren" is a character reference. Players who treat the wall as a single message will miss that two of the four elements are independent clues feeding two different puzzles.